Moving Time Machine to Catalina.

More of a best-practices post than a concrete article, but nonetheless there might be some value here.

Time Machine has worked in pretty much the same way since its incarnation on the grounds that macOS has also pretty much run the same way since its incarnation: as a monolithic OS that sits on a big volume with lots of bits of data sloshing around on said volume. Time Machine would obligingly go and grab all those bits of data, compare them against a destination, then bring over all the bits of data that it deemed had changed so that you had a snapshot of whatever was on there at the moment you did the backup.

This was all very sensible and worked just fine – right up to the point where the basic underlying mechanic of the way that macOS handled files (all sloshing around on a big volume) – irrevocably changed into more intelligently having all your files sloshing around on two entirely separate APFS volumes. And when I say “irrevocably” I mean it in the tangible, literal sense of “you can’t go back to the old way.” Apple makes this moderately clear in this document, right down there at the bottom:

“If you upgraded to macOS Catalina on a Mac that uses a Time Capsule or other network storage device as the backup destination, your existing backups are also upgraded and can be used only on macOS Catalina. New backups that are created can be used only on macOS Catalina.”

Well. Good to know. In case there was any doubt about this, Catalina changes out the tried and trusted .sparsebundle suffix for the new and improved .backupbundle, the latter of which cannot be opened on anything earlier than Catalina.

There’s further good news and bad news. The good news is that (at least in most typical cases) Time Machine seems to update your existing backups as part of setup once you’ve upgraded to Catalina. The bad news is that this takes a long time and uses a lot of space, as putting everything you use onto two APFS volumes with a drastically different file structure requires significant rewriting of your backup file. In fact, it’s pragmatically a toss-up about whether to let Catalina update your existing fresh ones or just start a new one.

I’ve found that if you have the time (and additional drives) then the best practice seems to be to try and get the best of both worlds. Back up everything under Mojave to two backup sets, detach one of them and stash it in a safe place so you’ll have a backup of your backup, then run the update to Catalina and let it go hog crazy on your remaining backup set. That way if things go awry then you have another clean copy of your old backups to pull data from (and, if it becomes apparent in short order that Catalina isn’t going to work for you, enough data that you can wipe the computer and roll back to Mojave with relative ease.)

New technologies always require transitions, and those transitions are inevitably messy – no matter how well-conceived and well-implemented. Time Machine is practically a venerable institution at this point, and while some parts of this new incarnation have been extant prior to now – local snapshots, I’m looking at you – making substantive changes in the way things work is always going to have rough edges.

And – although this is a good thing – I’ve yet to hit a point where it’s really been put to the test due to hardware or software failure (although I’ve done some full restores on new machines without incident.) Still, time will tell…

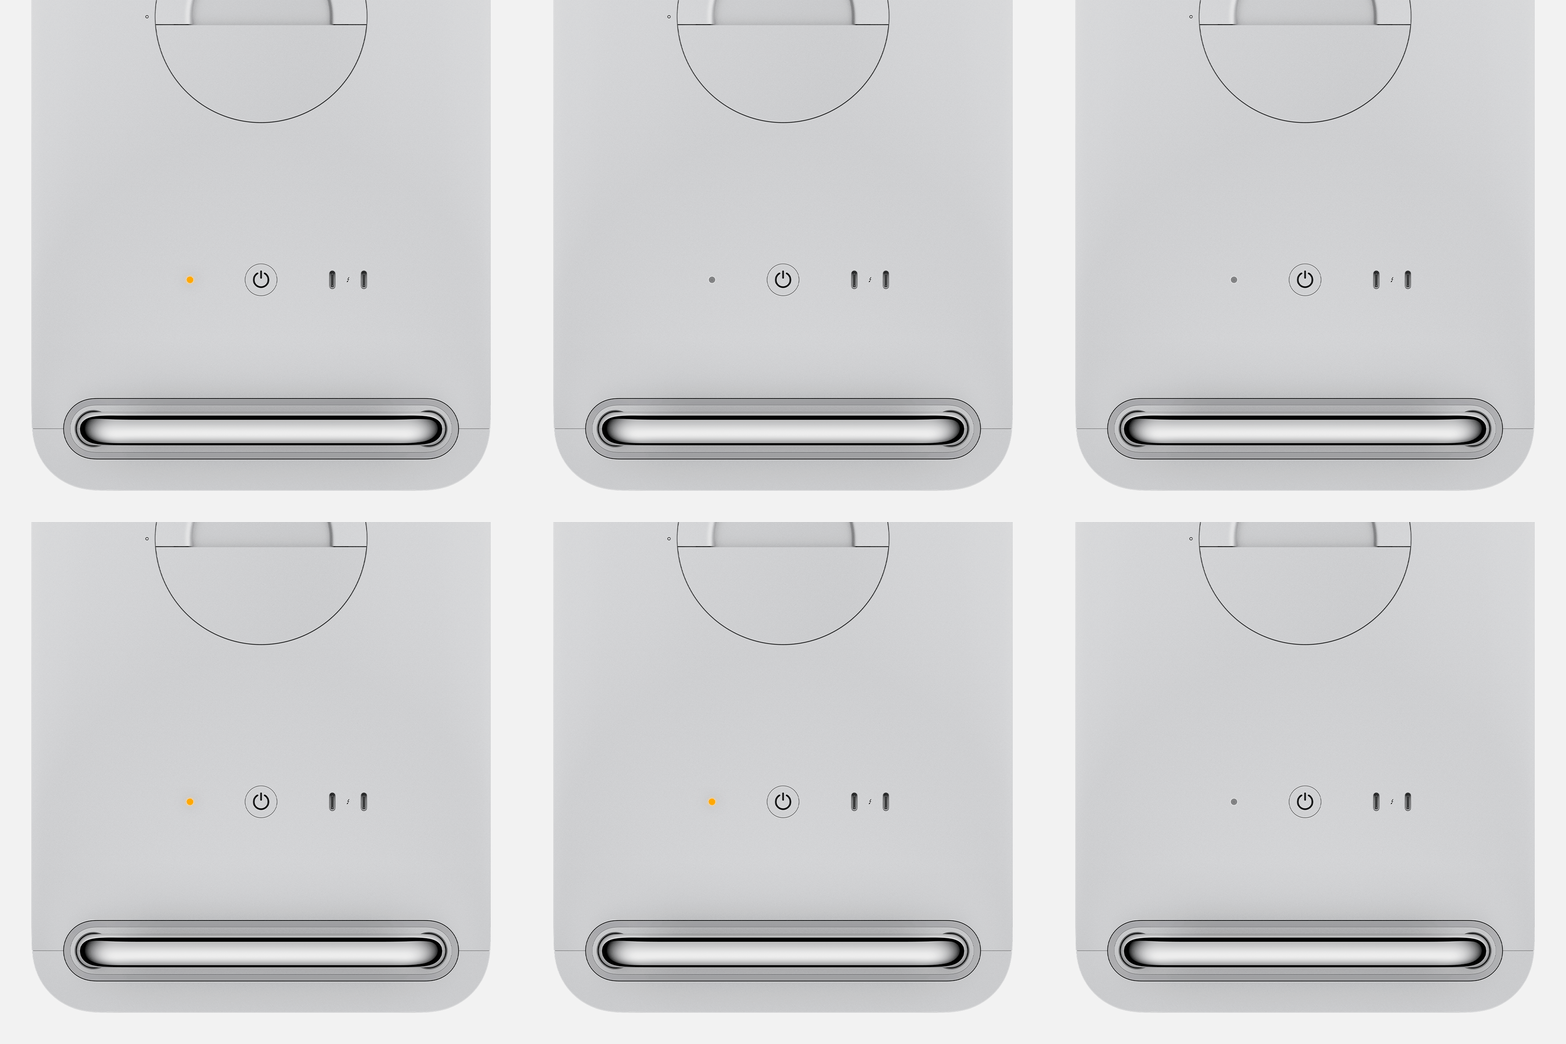
Mac Pro (2019) Morse Code

“If Mac Pro is in firmware recovery mode, the status indicator light rapidly flashes amber three times, briefly flashes amber three times, then rapidly flashes amber three times. This repeats until the computer is turned off. You might need to revive the firmware on your Mac Pro. If you still need help, contact an Apple Authorized Service Provider

So, to be perfectly clear about this, they’re saying that if your Mac Pro, say, suffers a power failure during a firmware update and requires repair then it lets you know this by flashing the standard International Morse Code signal for S.O.S?

That’s outstanding.

Rackmount Mac Pro

Back in the day when Apple was telling ACNs that Xsan was the new thing that we all had to know everything about I went out and bought an Xserve.

Okay, it wasn’t just me: it was my fellow ACN and business partner Seth and I . And it was three Xserves. And an Xserve RAID. And a giant box to put them all in. And a fiber channel switch, a ton of cards and cables and adaptors and assorted doo-dads. And it was glorious. And cost as much as a reasonable used Toyota. And it was loud.

Really loud. Really, really loud. To the point where Seth and I would eventually pad the mobile rack with a foam kit, and then wheel it into the back corner of our office in Carpinteria, and then finally wheel it into another room, and then close the door. Don’t get me wrong; Xsan was incredible once you got it set up, and it was equally incredibly advantageous to have a test platform in place that you could throw enormous amounts of data at and have it not even blink. But when we finally pulled the plug on the Xserve/Xsan/RAID experiment after one Xserve blew a processor and another developed some kind of remarkable fault with a backplane we saw the writing on the wall, migrated everything to a couple of nice Promise RAIDs, and ended up giving away, parting out, and eventually recycling the whole lot.

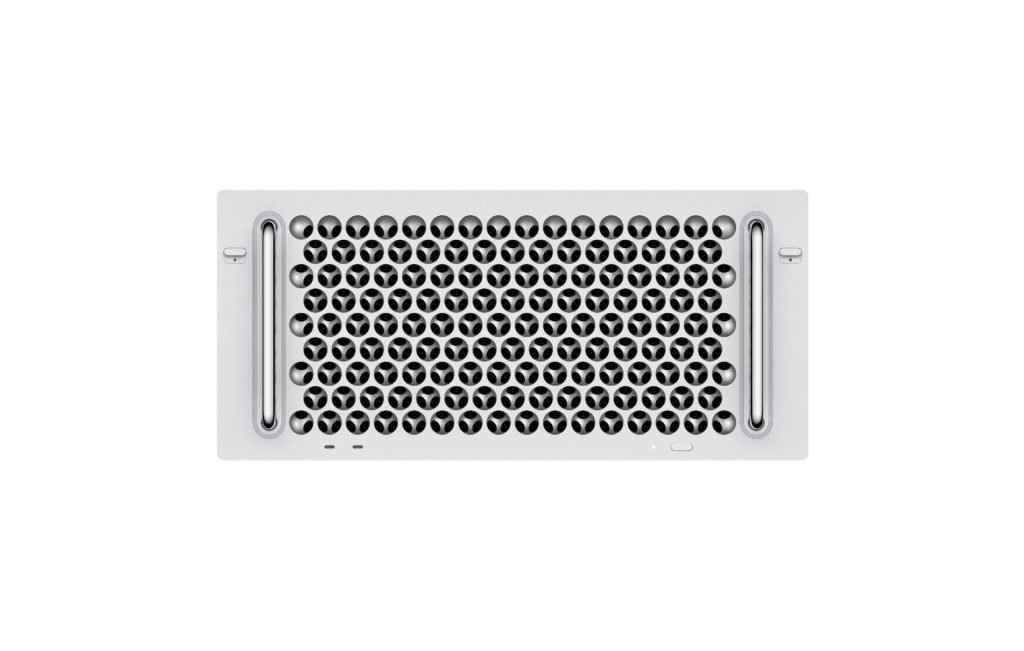
And then Apple stopped making anything that would fit in a rack mount (I’m not talking about you, Mac mini/Mac Pro 2013 rack conversion kits. Sit down at the back, there). Until they came out with this:

I find myself more curious about this than I am about the stock Mac Pro – and not just because it’s a fabulous-looking piece of industrial design (and for my money much better looking than the standard Mac Pro), but because for a platform that’s been carefully engineered for cooling and silence a rack-mountable version is a slam dunk.

The thing is that it’s not simply like they slapped a couple of 19″ rails on the side of the existing box so you could stick it into a rack; it’s an entirely different machine. Sure, there are a lot of similarities with the regular Mac Pro. The base models are identical on specs, but the rackmount version is $500 more, and that $500 gets you a different chassis with migrated ports from the top of the case to the front, built-in spots to attach the included rail kit and a slightly altered rear plane that looks like it’ll accommodate increased airflow. There are those who’ll look at the $500 increase and chalk it up to Apple padding their profits unnecessarily (cough cough Pro display stand cough), but I’d ask those people to go out and look for good rail kits for rack mount servers. Not the cheap, nasty powder coated jobs that eventually buckle and refuse to extend; a really good rack kit. Go on. I’ll wait.

You’re back? And you clocked that a 4U, four-post rack kit can handily set you back about $700? Yeah. I hear you.

It kind of makes sense, though. Four-post rack kits are pricey, and with good reason. If you’re putting your 40lb, $20,000 server six feet up in the air then you want to be very, very sure indeed that it’s not being held in place by something that’s going to snap or warp or wear out, and thus risk turning your extremely pricey (and probably business-critical) asset into a large aluminum box full of broken bits.

This a machine that exists in a world of very limited uses. For every hundred Mac Pros Apple sells they’ll be lucky if they sell one or two of these. This product is an anachronism. A delightful, absurdly clever and well-designed anachronism, but an anachronism just the same; a call-back to a product that existed for a few scant years, failed to thrive, and although it was brilliant never found sufficient traction to compete or persevere.

Which is a shame, because this is exactly the machine that the Xserve should have been; powerful, price and feature comparable with the Pro desktop du jour, and (once you get over the fact that a good rack kit is a non-trivial expense) cost-effective.

And quiet. So, so very quiet.

Cracking macOS account passwords with John The Ripper

I toyed with including this last time, but in the end opted to go a different way as macOS Catalina seems to (as of writing this) refuse to work very well with the latest version of John The Ripper. Worse still, the homebrew version seems to either not work at all or throw out very peculiar permissions-based errors no matter what machine I try and run it on. Still, undeterred, here’s how to use the “Pro” version of John The Ripper to crack macOS passwords.

Obligatory note: This is not in anyway an invitation to anyone to try and break into anyone else’s Mac. As mentioned last week, Apple includes very good security options right out of the box on their computers, and those are absolutely things that everyone should be employing. At the very least I implore you to turn on Filevault. Come on, folks.

Additional Obligatory note: Everything in this article would only be possible if you were able to follow the instructions I put in the last article about this sort of thing and thus had full, unfettered, unobstructed access to the OS.

A word about that “Pro” thing. Openwall – who host and distribute JtR – offer it for download to the world for free but will also sell you a copy for about $40 that gives you the kinds of boring things that you like to have when you’re a legitimate IT outfit and that are worth the money; i.e., something you can deduct from your taxes as a business expense and something to put in your asset file that helps you keep tabs on your tools and equipment. Openwall also offer tiered options and licenses that include assorted types of support, but I opted for the simple download sans support because I like figuring this stuff out for myself.

Which, it turns out, is shockingly straightforward. Just like last time, we’ll use the following command to go grab a copy of the target’s hashed password:

sudo cp /var/db/dslocal/nodes/Default/users/test.plist ~/Desktop

…and then use plist2hashcat.py to pull the hash out and put it into a file that we can use:

sudo python plist2hashcat.py ~/Desktop/test.plist

Next, download and build/use Homebrew to install/buy the pre-assembled binary of John The Ripper from Openwall, then download and unzip it into a directory of your choosing. I threw it in my $PATH, but your mileage may vary and I can think of a few good reasons that you might want to just tuck something like this away in a safe place and only pull it out when needed.

Fire up the Terminal, then cd to the run directory in the unzipped John folder. Once there, the syntax to run the thing is about as straightforward as it gets. I’m using the same hashed file as last time, thus:

./John ~/Desktop/test_hash.txt

Now, hashcat is great and it’s well-supported and super-flexible, but compared to John The Ripper it’s like swimming through a sea of molasses with concrete flippers. John The Ripper is fast. Like, seriously fast. From hitting return on that last command I counted twenty-two seconds before it spat out the following:

Twenty-two seconds to digest that hashed password and spit out “test1” which, drumroll, is the correct answer.

Again, as I pointed out last week this kind of thing is only useful on machines that aren’t using encryption like Filevault, and this only makes it clearer than ever that those kinds of protections are no longer optional in a day and age where someone with $40 and a little free time can break into your Mac seemingly at will…

Twenty Years

Today – January 5th, 2020 – is a banner day for Apple and anyone who uses Apple products and services. It’s the twentieth anniversary of a product/service that has become integral to the company’s entire internet strategy, app and media distribution efforts, and is the foundation block that every vital service – particularly development and device management – rest on. It is, in point of fact, the thing that turned Apple from a company clawing its way out of financial ruin and irrelevance into the behemoth it is today.

You might think – and I say this not in a subjective sense but in the sense of a person who asked his friends about this – that I’d be talking about something revelatory like the iPod (although you’d be a year or so early) or possibly the iMac (although you’d be a couple of years too late). Those are solid answers, but the real hero of the piece is our old friend, .Mac.

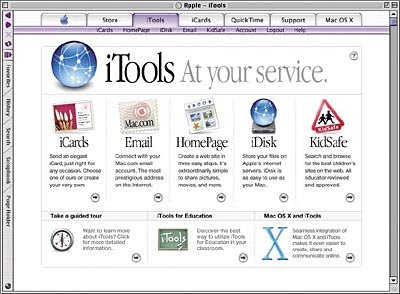
Okay, to be fair, it was originally called iTools because Apple was squarely fixated on their internet strategy and had made the reasonable decision to prefix everything with an “I”, but when you signed up for it (and I did on January 5th, 2000 from the cramped confines of our tiny apartment on Capitol Hill over a 28.8k modem) you got an actual email address @Mac.com and so much more.

Almost everything that came with iTools was weird, and is now gone. The two goofiest ones are easy picks: iReview and iCards. iReview was a sort of peculiar review site for web pages (a noble goal, but ultimately unworkable considering the exploding rate of web adoption amongst the world at large), iCards was a sort of Blue Mountain-esque web greeting card outlet.

Homepage wasn’t awful, and in fact was a fairly serviceable web-page tool that allowed you to host your own site on your iDisk, which could handle up to a whopping 15mb of content. iDisk itself enjoyed direct support in the OS, too; you had the ability to mount the thing on your desktop as if it were just another drive that made copying data to and from the thing laughably simple and intuitive in a way that probably makes iCloud Drive wake up in a cold sweat every night.

A couple of years later iTools became .Mac, and then .Mac became iCloud, and now I have an email address that works with all of those suffixes and has done so – reliably – for twenty years. And because I’m a digital packrat, I can look at those early mails like some sort of data archaeologist and capture little glimpses of the places we all lived and the things we all did back then. There are pictures of my first new car in there, and long email chains between my wife and I that are weird echoes of who we were before we had kids and mortgages. Updates from friends whose names I’ve long-since forgotten, and notes to and from my Dad who passed away almost eighteen years ago.

My private fear is that someday some bean-counter at Apple will look at iCloud and decide that enough is enough and that .Mac addresses will no longer Be A Thing and that we’ll be left with .me.com and iCloud.com, and while that may cause some headaches about AppleIDs and address books I don’t think it’ll be the end of the world. Still, it would be a shame. Twenty years is an eternity in the internet age.

So, Happy Birthday iTools. If I have one wish it’s that you’ll be here in another twenty years time, and that I’ll be around to check back in with you then.