OS X Patcher (or: There’s Life In The Old Dog Yet).

Way back at the beginning of the end of the world I walked into a store and dropped the astounding sum of five bucks on an iMac.

Behold. And while you’re beholding note the $4.99 scrawled in permanent marker on the top left corner. Grr.

(Note: the store in question is Alpha Thrift, which I unhesitatingly endorse because yes, it’s virtue-signally of my demographic to do that kind of thing but I actually think that they do an incredible job of supporting challenged and disadvantaged individuals and families, which is something we should all be getting behind right now.)

The Alpha Thrift I swing by now and again is next door to the health food store that has the weird special tea that my wife likes, so it’s an easy diversion to go and nip in there to look at stuff. Now and again they have computer bits that are worth picking up – the odd G4 iMac, a lot of keyboards and screens, but on that particular occasion I found a white Intel iMac, sans cords and keyboard/mouse, and figured “what the hell” and bought the thing.

It’s a late 2006 with a 2.16Ghz Core 2 Duo, a 250GB hard drive that I switched out for a spare SSD, and I also replaced the 2GB of memory with a couple of 2GB sticks I had left from my stack-of-dead-Mac-Mini project. I’m guessing from the neat lines of tape that were stuck to the screen that it was somebody’s home office machine and it was in remarkably good cosmetic condition for a computer that’s been around for fourteen years, with none of the fading/burning in that you get in screens of that vintage. I upgraded it to Mac OS X Lion 10.7.5, fooled around with it, then put it on a shelf in my garage because it turns out there’s very little you can practicably do with a computer of this vintage in this day and age. Getting Homebrew on there was an unruly and problematic hack, the only browser I could reliably get to run was Chrome (and even that protested), and it turns out I had no use for a five-dollar iMac and no time to find one.

Still, I couldn’t let go of the idea that – just maybe – there was something I could still do with the thing if I managed to workaround the limitation of 10.7.5 being the maximum supported version of the OS. The Mac Pro that was under my desk until very recently ran Catalina via the dosdude1 hack, but while there are ways of shoehorning macOS Sierra and up onto older machines my venerable iMac missed the cutoff for those by a generation or two. A few years back there existed some ingenious methods for getting OS X Yosemite 10.10 onto computers of this vintage, but the exact means and bits of software required to make that happen have sort of drifted away in the tidal sands of the internet and are no more.

Finally, I found RMC OS X Patcher, which seemed like the perfect solution except that I just couldn’t get it to work until I did some poking around and reinterpretation of the instructions, which I shall now present for your delectation and delight. So…

In order to make this work you’ll need the following:

• An existing Mac computer – ideally something current that works.

• An old, unsupported Mac that you want to install a modern operating system onto.

• A USB Thumbdrive large enough to hold a Mac OS X Installer (I used a 64GB one because I have a bunch of them in a drawer but you’d be okay with 32GB as well)

• A full installer for the operating system that you want to put onto the old computer. Current downloadable operating systems only give you a download of the installer application, not the full installer package. I used mas to download an installer for El Capitan for my ancient iMac.

• A few hours.

Note: Most of the below is liberally cribbed from the instructions page on RMC’s site, but I’ve made some changes to clarify some things that were not abundantly clear and caused a certain amount of confusion. I am not pretending to be any kind of authority on how this dark magic works; I’m just a pronunciation guide for the trickier bits.

  • You’ll need to download the latest version of the OS X Patcher software from here after you’ve looked at the Supported Macs list found here. If your old Mac isn’t on this list then don’t go any further. Yes, this is all about installing modern operating systems on old computers, but there’s still such a thing as too old. Sorry.
  • Plug your USB Thumbdrive into your current, modern Mac and erase it in Disk Utility as Mac OS Extended Journaled. Give it a simple name like “Installer”.
  • Find the OS X Patcher software you downloaded and double-click it to unzip it. Open the Terminal up, type in chmod +x and then drag the OS X Patcher.sh script into the Terminal window and hit return.
  • Still in the Terminal, type sudo and then drag the script into the Terminal window again and hit return.
  • The script will run and give you a choice to hit “1” for Patch Installer and “2” for Patch Update. Type “1” and hit return. It will then ask you for the installer for the modern operating system you want to use to make into a hacked installer to use on your old Mac, so you should locate the full installer for that operating system and drag it into the Terminal window and hit return again.
  • Next, it’ll ask you what volume you’d like to use and you should type in the name of the USB thumb drive that you’re going to be turning into an installer for your modern operating system (e.g., “Installer”). Hit return again and then wait as it copies/builds the installer onto the thumb drive. And wait.
  • Once the script has finished running you can quit out of Terminal, eject the thumb drive, plug it into your old Mac, then power it on while holding down the Option key on the keyboard until you see the boot picker menu. Choose the Installer disk you created on your thumb drive, then hit return to boot from that drive.
  • It should open up into the installer for the OS, but before you start installing things there are some things to do first. For one, while you can technically install onto an existing drive it’s going to be a lot simpler and less problematic if you’re installing onto a clean, erased drive, so if you haven’t done so already and want to make sure that any data on the drive in your old computer is backed up then this would be an excellent time to reboot from the internal drive in your old computer and back that data up.
  • Still, if you’re happy erasing the drive then this is the time to do it. From the Utilities menu at the top of the screen choose Disk Utility, then erase the internal drive and reformat it as Mac OS Extended Journaled, and once that’s done quit out of Disk Utility.
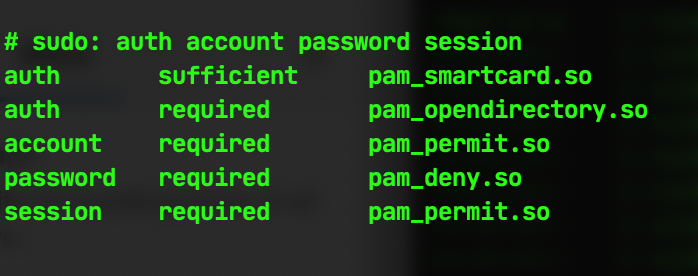
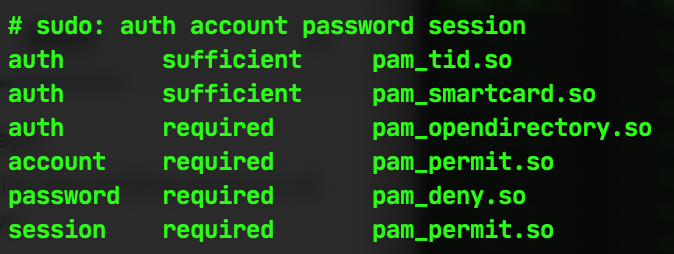
  • We’re not ready to install yet, though. The next thing you’ll probably need to do (particularly if you’re using an older Mac OS X Installer like I was) is fool the computer into thinking that it’s still valid and signed, and that means lying to your computer about the date. I wrote something about that here, but in case you don’t want to wade through that then you’ll need to find out the date that the operating system was released on (El Capitan was September 30th, 2015), then turn off wifi from the wifi menu at the top right corner of the screen on the old computer/unplug any network connections. With that done, you’ll need to open the Terminal from the Utilities menu at the top of the screen and use the date command to fool the computer into thinking that it’s just a few days after the OS was released. The command I used for El Capitan was date 1001000015 (for midnight on October 1st, 2015).
  • Finally, you can then go ahead and run the installer. Once it’s finished, reboot but hold the option key down again to boot from your thumb drive.
  • Open the Terminal from the Utilities menu and type in patch and choose the default Machine ID that the script decides your old Mac conforms to (mine was iMac 5,1) Hit return, then type in the name of your internal drive (e.g., “Macintosh HD”) and hit return again. The script will run machine-specific patches, and once that’s done you can just reboot and use your updated Mac.

Some notes: this iMac is old. Very old. Old enough to the point that it comes with an astonishing 128mb of video memory, and because this old hardware isn’t supported by the drivers that come with the OS some things like, well, any kind of graphics acceleration are not supported at all. So, forget gaming or video or anything graphic-intensive (or graphic-involving, for that matter). Still, that aside, it’s clear that if you’re willing to invest a little time (and five bucks) then you can actually get something that’s… well, decently usable and surprisingly responsive, or maybe just be able to keep an old computer that you have in the back of the closet ticking for a little while longer…

Sudo and Touch ID

So, I really like my 16″ MacBook Pro. I spent years using smaller laptops on the grounds that they’re light and easy to lug around all day, but having this enormous screen and astounding performance has proven invaluable in a world in which I’m not often in my office because, well, The Apocalypse™.

Still – and I don’t want to be all 2017 about this – the Touch Bar and Touch ID bother me. I think it’s because I’m a dinosaur and have legitimate old-school-Mac-user-get-off-my-lawn cred that I’m eager to use. My first laptop was a PowerBook 160, for goodness sakes. The idea that there isn’t a physical button for everything is still strange and alien and makes me feel oddly, incalculably lonely. The world has changed so much, and now they’ve taken buttons away from us? Is there no end to the madness?

Not mine. My Powerbook 160 is in a box, slowly crumbling from age.

You get the idea. Happily, there are some things I do enjoy about the new way of doing things, and while you’ll never convince me that I’ll relish using a button that might not be where I expect it to be because button placement is now contextual I am quite digging Touch ID. It’s great, and it has really solid integration in Apple’s ecosystem, and with a little tweaking you can use it for more than what it says on the side of the box.

For example; using it in the Terminal. I’ve reached the point now that I have to stop and think for a moment to recall what my login password is because I type it so seldom, which is annoying when I’m trying to sudo a command and then have to ham-fistedly bang said password into the Terminal, except now there’s a way of telling Touch ID to do that for you.

We do it using the miracle of PAM (Pluggable Authentication Modules). It’s not a new idea or technology, and it’s been widely used in UNIX/Linux/*nix flavors of many kinds going back for a long time; in it’s simplest terms it’s a little mechanism that sits between you (the user) and the service on your system that you want to use. The service we’re really interested in is sudo, but if you want to see the other default services then you can go take a look in /etc/pam.d

macOS doesn’t keep its PAM modules in etc/pam.d but instead stashes them in /usr/lib/pam. I mention this not because there’s a lot to be gained from poking around in there but because I had a devil of a time finding them, and this way I have some record of where to look so future-me doesn’t have to go reinvent the wheel and spend half an hour spelunking in the Terminal issuing salty oaths. You’re welcome, future me. Jerk.

There are modules for all kinds of functionality; smart card support, Kerberos authentication, Open Directory as well as simple deny/approve functions. For now we’re only interested in the pam_tid.so module (where tid = Touch ID) and making that work with the sudo service, but it’s clear that this is a tool that a discerning admin could use to do some pretty impressive tweaking of the fundamentals of how the OS handles users and services.

The first move is to go into /etc/pam.d and edit the sudo config file, like so:

sudo pico /etc/pam.d/sudo

Which will give you this:

We’re going to tie in the pam_tid.so module for authentication and make it useable for executing the sudo service by adding

auth sufficient pam_tid.so

…to the first line of the configuration file, leaving it looking like this:

Once you’ve saved that file then you should be able to use Touch ID to authenticate any command that requires sudo. You can test it out with something innocuous, such as sudo cd ~/ which will then put up a prompt like this on your screen to tell you to put your finger on the Touch ID button:

And that’s about it! All first-world-problem jokes about the exhausting chore of having to type a password into a Terminal screen aside, this is a really nifty way of leveraging something that’s been built into macOS to use the powerful biometric security in your computer in place of a normal password, which can be attacked or stolen or, let’s face it, forgotten.

WWDC Non-Predictions

So, WWDC 2020 is coming up in three days, and a lot of people in my neck of the tech industry are interested to see what exotic treats, unusual surprises/rare unguents it will bring. Rather than throw my two cents into the ring on the thrilling stuff that will bring (i.e., ARM transition etc) I thought I’d instead jot down the things that I think should make an appearance (but that absolutely will not do so).

• Face ID for Macs would be nice, and I think it’s absolutely doable, but probably not with current Mac hardware. I mean, it seems like a logical move – we already have Touch ID and the T2 chip to handle the grunt work of authorization, but when the current, brand spankin’ new portables line is rocking pretty lousy front-facing cameras and no sensors for doing the kind of mapping required to make Face ID work then it’s hard to make an argument for this coming any time soon.

• Xcode for iOS is also something that I’d love to see but that I’d be fabulously surprised would make the cut. Yes, we have Playgrounds (which is very decent and really nice for people like me who enjoy a healthy refresher on the very basic blocks of programming), but that’s not the same as the full IDE. And that’s a shame, because the iPad Pro is a very capable machine power-wise and also has a huge market footprint – being able to write iOS applications on an iOS device would be great for a lot of people but I don’t see it coming soon. Plus, there’s a pleasing symmetry in the idea that where you currently need a Mac to write iOS applications, you might be able to use an iOS device to write Mac applications.

• While we’re on the subject, I’d like an actual, Apple-approved or Apple-branded Terminal application for iOS. It’d be a niche product, sure, but for the folks who’d use that functionality it would be extraordinary to suddenly have a raft of tools available that they wouldn’t otherwise keep to hand. Still, that raises the idea of being able to execute code on the iPad that isn’t Apple-approved, and it’d have to be rigidly sandboxed as an environment for them to even consider the idea. I’m sure that there’s some internal math where the balance between the cost benefit of dealing with licensing open source tools for iOS would be weighed against the actual number of losers, and my gut says that even with nobody putting their thumb on the scale it won’t be worth pursuing. And this makes me sad because that would be pretty incredible.

• USB 4/Thunderbolt 4 introduction on the Mac/iOS. It seems clear that those two technologies are destined to converge, but it’s too early in the game for Apple to widely start supporting and implementing them. This time next year, maybe.

• Wildly experimental new hardware products/technologies. Apple tends not to intro new hardware at WWDC, preferring to go with special events for those because they like to keep their focus and message tight on product introductions. And that’s very smart. I don’t think there’ll be any introductions of significant hardware products for any of their platforms. There’s a lot of talk about Apple AR glasses being a thing, and that’s an interesting idea, but my hunch is that Apple probably has a bunch of things going at any one time and a lot of them never see the light of day. Remember the kerfuffle about how Apple Is Doing A Car? And yet no cars have appeared, and I suspect none are likely to do so.

Now, it’s worth noting that my batting average on predictions is… well, it’s pretty dreadful. I guess we’ll find out How Wrong I Am on Monday the 22nd…

Secret Fonts in Catalina

This is really cool.

Font management in macOS has radically improved over time; there are people who’ll throw a lot of shade at macOS Catalina, but for every niggle and complaint there are a bunch of neat, clever little fixes and features that don’t necessarily get the exposure and appreciation they deserve.

Licensing additional fonts that can be delivered through Font Book is both smart and creative. It’s also something that could be extensible – while font licensing isn’t what the vast bulk of people would automatically think of as a killer feature in an OS there are plenty of folks in the creative/design world who would richly appreciate, say, some kind of macOS Font Store. As someone who works primarily with those kinds of users, I’d be more than happy to see specific cuts of fonts that could be automatically purchased or licensed and that would just plain work with the OS. I mean, if you’ve ever spent an hour or two digging through the font folders on macOS doing forensic font-management then you’d appreciate, well, never having to do that again.

Toggling the login window

Fantastically brief and remarkable one, this.

If you run a system with hidden users (which may sound bizarre and creepy on the face of it, but it’s something occasionally required on MDM-managed installs) and you want to log in as that user on your computer then this is a useful tip that used to be available in macOS documentation back when macOS was good old-fashioned OS X. It seems to have disappeared now, which is a shame, but it’s also pretty cool that it’s quietly persisted over the last dozen OS versions.

The default display at the login window is the icon view for each user; click on the user, enter the password (or authenticate via TouchID) and you’re in. Great. But if you want to be able to set that login window to display Username/Password fields then you have to log in, go to the System Preferences and make changes there so that the next time you log in you get that option. It’s a drag, because it’s a bunch of extra steps. If only there were a quick and easy way of toggling between those login window options. You can see where this is going.

Here’s how to do it:

• At the login window – when presented with the icons for each user – don’t click on anything. Instead, tap the left or right arrow on the keyboard to highlight a user. If it’s not your main user then that doesn’t matter; the trick is to highlight something.

• Hit Option-Return on the keyboard, and the window will switch to Username/Password fields, thus allowing you to type in the short name and password of the user you want to log in as.

You can hit Option-Return again to toggle back, but as the change is only for that login window session you’ll get your normal icon view back the next time you log in…

DoH! (or: Securing Traffic with DNS over HTTPS)

A few weeks back I wrote about the FrankenMini – the Mac mini I assembled a la Tony Stark out of a box of scraps. Okay, Iron Man did his thing in a cave in the desert with a bunch of weaponry and I did mine in my garage with a couple of screwdrivers and a certain amount of swearing, but we both looked a little sickly and had uncool scruffy facial hair, so I’m calling it pretty much a dead heat.

I used to run a much nicer Mac mini as a file/web/whatever server in my home office, but switched that to a nice Synology Diskstation that’s synced to an identical unit in my downtown office, and with that in place I no longer had need of the nice Mac mini which went on down the road to a friend of mine. This, it turns out, was no great loss, as Apple has been steadily and methodically stripping functionality out of macOS Server for years, and as such there wasn’t a lot of tinkering possibility locked away in the thing.

But now I have this old, terrible, not nice-but-perfectly-serviceable Mac mini doing little except feeding the occasional print job to my 3D printer and sitting reproachfully on a workbench, so I thought I’d do something useful with it and implement DNS over HTTPS (or DoH if you don’t like a lot of typing. Which I don’t.)

Hmm? What’s DNS over HTTPS, I hear you say? Let me explain.

If you’re interested in a slightly higher level view of the basic mechanics of DNS – and I highly recommend you dip a toe into that water because it’s perfectly warm and not as full of monsters as you may expect – I’d encourage you to go look here at this excellent write up on cloudflare.com:

“How does DNS work?”

DNS is (to cut a tremendously, tremendously long story short) the way that your computer turns human-readable internet names (e.g., www.apple.com) into the actual IP addresses that your computer needs to get to a webpage (e.g., 23.15.137.53). It does this by reading what you type into, say your browser (although many, many things on your computer use DNS, a lot of which you wouldn’t think of and many that you’d never know about) and then sending that inquiry off to a DNS server (or more correctly a DNS resolver) – usually on the internet – that does the footwork and goes and queries other DNS servers to work out where it is you want to go.

But how does your computer know where the DNS server/resolver is? Well, the address of the DNS server/resolver is something that’s provided to your computer by whatever network your computer or device is connected to – your home router, or your mobile hotspot, or the coffee shop wifi network (back when we could go and sit in coffee shops, that is). Those networks assign your computer or device an address on their local network and a DNS server so that when you send a query out to the world at large to look at www.apple.com that network will know where you are to send that information back to you.

The internet as we know it only functions because of DNS, and the architecture of DNS is one of the great unsung marvels of the modern age. It’s not sexy or cool or attention-grabbing, but were it not for DNS there’d be no Google, or Amazon or Netflix or… well, you get the idea. Still, DNS dates back to 1983 and because it’s such a crucial part of the way that the modern world works, progress on things like security have been slow albeit steady. It’s not the kind of thing you can make major, paradigm-shifting changes to without breaking modern civilization very badly, which, I think we can mostly all agree, would be A Bad Thing.

The chief problem with DNS is that the resolver sits there, happily gathering information on what you’re sending it whether you like it or not. As a general point of principle it’s a little creepy that your ISP or whoever is providing you with the resolver knows what’s going in and out of your computer, but principle aside there are a lot of use cases where that’s data that you really don’t want getting out there. I’ve worked with clients who are doing contract work for the DoD, for example, and who aren’t thrilled that someone with a will and a relatively small amount of resources could theoretically sniff the traffic they’re sending to their DNS resolver. Happily there’s a way of stepping around that, which is where the FrankenMini™ steps in.

Cloudflare offers a fast, secure DNS resolver that encrypts traffic with TLS via HTTPS. In more normal English, HTTPS is the securely encrypted version of HTTP, which is in turn the protocol used to deliver web content over the internet. When you connect to a secure webpage – a bank or online store for example – you’re probably connecting via HTTPS. However, when your computer goes to initially send an inquiry to most DNS resolvers that inquiry is sent as an unencrypted HTTP request – in effect, your ISP can’t see what you’re doing on a secure website, but it can snoop on where you’re going.

Many modern browsers (Chrome, Edge, Brave, Firefox et al) already have DoH built in as options, but Safari does not. And that’s vexing. Additionally, there are other types of software than web browsers that also use DNS, and it’d be nice to be able to roll those protections over for those other pieces of software or services. Happily, Cloudflare has an option for that – the cloudflared client. If you install this onto your Mac then anything on that Mac will be able to use DoH. And if you make that Mac your DNS server then anything on your network will likewise automatically be able to use it, too.

So, on one hand I have a FrankenMini™ and in the other hand I have cloudflared. I think you can probably work out where this is going.

To business, then – setting up the FrankenMini™ to be a DNS server so that every DNS search is encrypted and nice and secure!

First, we’ll need a DNS server that we can run on the Mini, because otherwise there’ll be nothing for the devices on the network to use. I’m going to use dnsmasq because it’s open source, easy to configure, pretty well-documented and generally awesome. Once that’s in place I’m going to install cloudflared so that DNS requests that the Mini sends out are covered by DoH, and finally I’m going to tie those two things together so that DNS requests from computers/devices/whatever on my network come into the Mini via dnsmasq and the Mini then pushes those DNS requests out via cloudflared.

Installing dnsmasq and cloudflared is done via homebrew, thus:

brew install dnsmasq

…and then

brew install cloudflare/cloudflare/cloudflared

Once dnsmasq is installed the next step is to configure it to look at itself so that it can pass requests to the cloudflared client. This is done by digging into the dnsmasq configuration file at /usr/local/etc/dnsmasq.conf and then changing the default of #server=/localnet/192.168.0.1 to server=127.0.0.1#54

The next step is to configure cloudflared. Happily, Cloudflare has this covered on their site and it’s a simple matter of making a cloudflared directory in /usr/local/etc/ and then creating a file called config.ymlin that directory. You populate that file via a copy/paste job with a couple of minor tweaks – while normal, common-or-garden DNS runs on port 53 we’re telling dnsmasq to send inquiries out on port 54 and cloudflared to listen for requests on port 54 so that they can talk to each other privately and don’t start playing havoc with every other device on the network, and additionally we’re going to set a no-autoupdate flag:

no-autoupdate: true
proxy-dns: true
proxy-dns-port: 54
proxy-dns-upstream:
  - https://1.1.1.1/dns-query
  - https://1.0.0.1/dns-query

All that’s left is to make cloudflared and dnsmasq start when the computer boots up – the FrankenMini™ sips power like a little tiny baby bird, so it stays up and running 24/7, but on the off-chance that it needs rebooting it would be a hassle to have to remember to go into the garage (which, as mentioned in the main FrankenMini article is cold and chiefly filled with ghosts and rats) to manually go and kick-start the DNS server. Happily, cloudflared and dnsmasq include tools for this very purpose which you can install by typing the following into the terminal…

sudo cloudflared service install

…which will install a launchctl item at /Library/LaunchDaemons/com.cloudflared.plist, and…

sudo brew services start dnsmasq

…which will similarly enable dnsmasq

After that it’s simply a case of setting each device on your network to look at the IP address of the machine that’s running dnsmasq/cloudflared (or, in my case, setting my router up with that address so that every device connected to my network automatically gets that address).

One unanticipated but welcome discovery has been that Cloudflare’s DNS resolver (1.1.1.1) is astoundingly fast, and I don’t know about you but I’ll take fast and secure over slow and dreadful any day of the week…