Not a terribly catchy title, but then again it’s not a terribly catchy subject. Still, a useful thing to have up your sleeve and incorporate into your regularly-scheduled maintenance. You are doing regularly-scheduled maintenance on your computer, right? Not just letting it be and then being surprised when it transpires that your sole copy of The Great American Novel™ disappears one day and you discover that the last backup took place sometime last June? Thought so. We’re all terribly responsible.
I’m a big fan of homebrew because I’m a sucker for package managers and small, superb little tools that make your life easier in a million ways (provided that you’re passably comfortable with using the Terminal.app). However, now and again I have to switch machines or upgrade/reinstall, and it’s a drag to have to remember all the stuff I’ve installed onto one machine and then go and find it all and reinstall it again on another machine. Yes, it’s not what you might call an everyday occurrence, but it happens from time to time and is – for lack of a better catchy epithet – a total bummer
Fortunately, you can mitigate some (if not all) of that by using a brewfile to go and build a list of everything you have on your computer and then format that in a file that homebrew can read and use to reinstall everything. And it’s ludicrously simple to do, thus:
• Install the Homebrew bundle tap: brew tap Homebrew/bundle
• Run the bundle command to dump a formatted list of all your homebrew packages into a brewfile: brew bundle dump
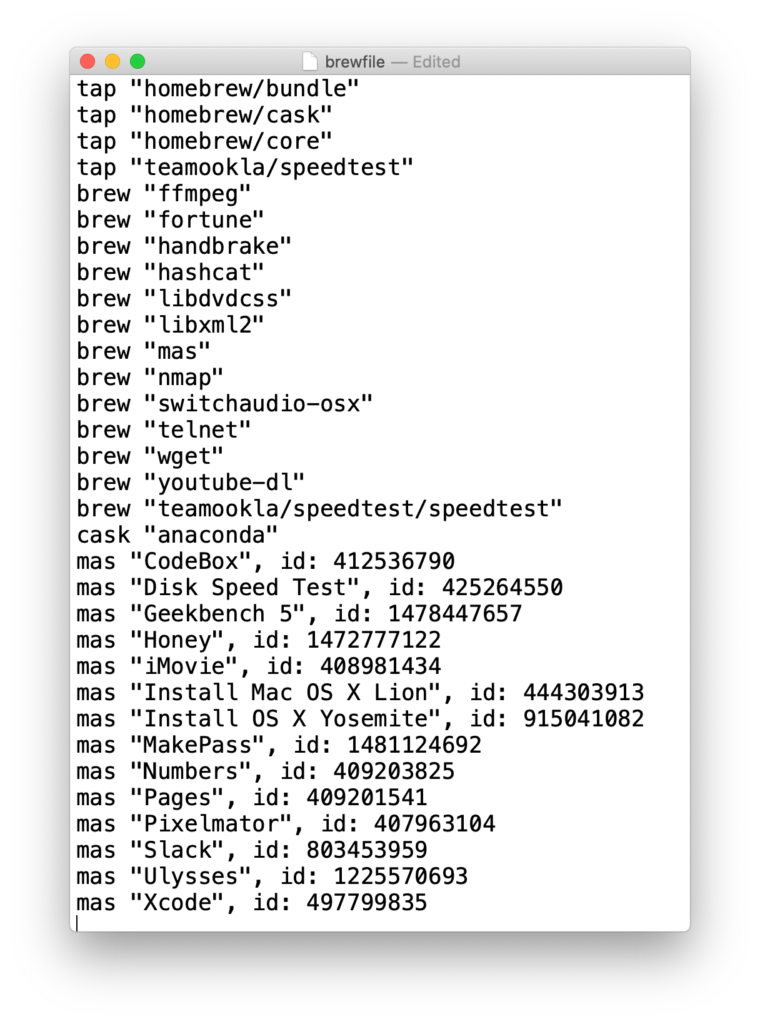
This will go and create a file called “brewfile” at the root of your home directory, and opening that file will reveal something like this:

Now, having that brewfile on your computer is great, but in the case where you’d want to restore that onto a new computer then there’s no guarantee that your older computer will be accessible (or even functional), so having the file somewhere else seems like a good idea. If you run the brew bundle dump command a second time it’ll error out because the file already exists, so I like to combine it with a mv command to create the file where it expects it to be (in my home folder) and then move it to my Dropbox, thus:
brew bundle dump; mv ~/Brewfile ~/Dropbox/
Because the mv command is moderately intelligent it will overwrite any existing file with a new copy, thus saving a lot of tiresome hunting and deleting every time you want to save a new copy.
Finally, I automate the process by creating an alias in my .zprofile to do a lot of the tedious typing for me:
alias brewfile='brew bundle dump; mv ~/Brewfile ~/Dropbox/'
Great! But what if I want to also put a copy of my .zprofile to Dropbox as well? I can’t use the mv command for that because, well, I need my .zprofile where it is and not solely living in Dropbox where it can’t do me any good. All things are fixable through the mercy of hideously clunky shell commands, so I cobbled together this monstrosity that seems to do the job nicely:
rm ~/Brewfile; brew bundle dump; cp ~/Brewfile ~/Dropbox/; cp ~/.zprofile ~/Dropbox/zprofile
You can also make an alias of this roiling horror in your .zprofile if you can stand it, like so:
alias roilinghorror='rm ~/Brewfile; brew bundle dump; cp ~/Brewfile ~/Dropbox/; cp ~/.zprofile ~/Dropbox/zprofile'
Using the brewfile to restore your packages onto a new machine is trivially simple; just install homebrew, then brew tap Homebrew/bundle again to get the bundle package onto your machine, then finally put your saved brewfile into the root of your home folder (where bundle expects it to be) and run brew bundle install – depending on all the stuff you have on there it can take a while (and if it’s trying to pull down Xcode and a bunch of Apple productivity apps then I mean a while).
This approach isn’t what you’d call pretty, but it’ll get the job done. And if that’s not the definition of using UNIX packages then I don’t know what is.
