I don’t think I wrote anything last week, which is something I feel low-grade anxiety about. One of the things I’ve been trying to do as some sort of Psychic-Goat-Sacrifice-To-The-Apocalypse-Gods is to knock out a few words of wisdom now and again so that I can tell anyone who cares that I’m trying to put some positive energy out in the world or somesuch. It’s a lie, of course; I’m just writing things down because I have more free time to bang my head against problems these days, and if I don’t record that stuff then I’ll just forget.
I’m good at forgetting things. Not maybe-I-should-seek-professional-help good, but definitely in pro-am territory. Happily, technology has solutions for people like me, and those solutions tend to be the common-sense, regular solutions that I’ll cheerfully recommend to anybody who’ll pay me to have an opinion; keep your data safe and accessible, and back it up. A lot. Equally handily, there’s a relatively simple thing for doing that – a NAS. Specifically (in this case) a Synology DiskStation 220+, nestled discreetly in a bookshelf:
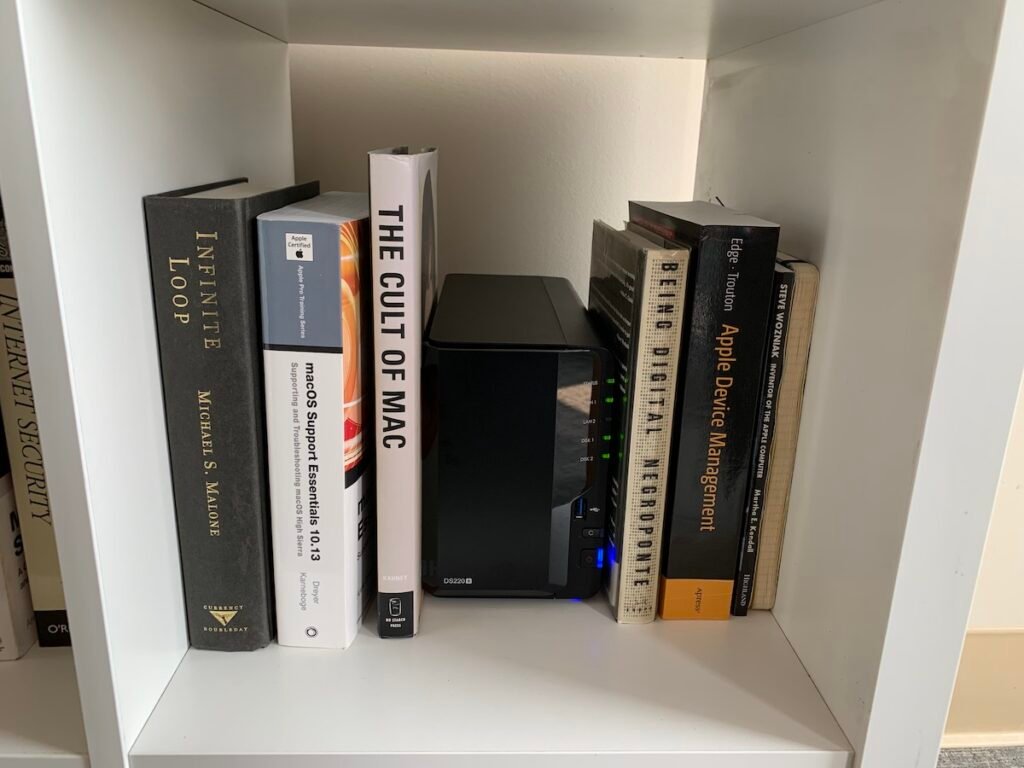
I love Synology DiskStations. They’re an excellent piece of kit, striking the line between full-featured and accessible, allowing you to do pretty much anything you want with data without making the process utterly incomprehensible. They’re the perfect $300-if-you-have-your-own-drives solution for the enterprising young IT consultant on the go, and while the latter part of that sentence seems unduly optimistic, the three hundred bucks part rather does the heavy lifting, value-wise.
The problem with having one of these in my office is that they don’t support WiFi, and the only internet I have in the office is WiFi, and there’s literally nothing that I can plug anything into to get internet via the customary physical route, i.e., a cable.
So, a problem. What I really needed was to find a way to bridge the wireless connection in the office (via Cox Wifi and their Captive Portal) to the Synology box, and at first blush this seemed pretty simple.
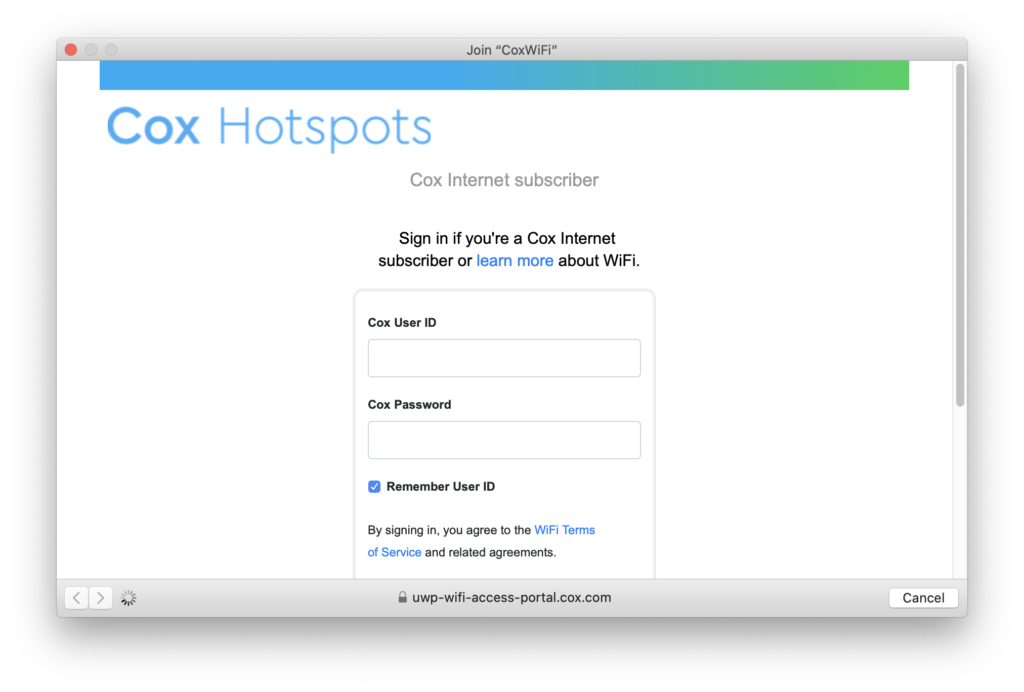
When you first sign a new device onto the Cox Hotsports Captive Portal (which I’m going to call “WiFi portal” from now on to save a lot of typing) it prompts you for your credentials, and once you’ve entered those you’re able to stay logged in to the network for as long as you might possibly want, because what the WiFi portal does is capture your MAC address, checks to see if it’s authorized to use the network, and then if not gives you a prompt for your username and password. If you have a web browser installed on your computer (which you do because otherwise I’d be intrigued to know how the hell you’re reading this) then most of this is done for you. But the Synology DiskStation has no web browser, and even if it had one it has no WiFi hardware that would allow it to connect to the WiFi network in the first place.
Oh dear.
So, I have no ability to use the Synology with WiFi, but I do have a number of large boxes filled with cables and assorted bits of networking gear of assorted vintages. Trawling through those boxes yielded one part of the answer in the form of an Apple Airport Express.
These are little puck-sized wireless boxes that were mostly designed to extend existing Apple Airport networks, but also did decent duty as simple routers that you could use to create wireless networks. One of the great things about them is that the built-in Airport Utility software in macOS gives you the option to Join A Wireless Network, which effectively turns the Airport Express into a little wireless bridge. In English: you select this option, choose a WiFi network to connect to, WiFi goes into the box, and internet comes out via a cable. Perfect. Except that there’s no web browser installed on the Airport Express so you can’t sign it into the WiFi portal, which was the same problem we had when we started.
Except no, it really isn’t. What’s happening when you use your web browser to sign into the WiFi portal is that – as I mentioned before – the first thing that happens in the process is that the portal looks at your MAC address and decides whether or not you’ve connected before. If you can tell the portal that the MAC address its looking at is one that it’s seen before then the portal will simply allow the device that bears that MAC address to connect to the network, no questions asked.
So, let’s start lying to the WiFi portal about who we really are. To do this we’re going to temporarily change the MAC address of your computer so that you can use it to connect to the WiFi portal, and then once that’s done whatever device that actually owns that MAC address will be able to connect. This is done via the command line with the following command: sudo ifconfig en0 ether 00:11:22:33:44:55 (where 00:11:22:33:44:55 equals an actual MAC address and not a lazy placeholder). You’re going to do this more than once, so if you’re like me and enjoy tinkering with your whole Terminal environment then you can add it as an alias to your .zprofile, thus:
alias mac='sudo ifconfig en0 ether'
The first step is to make sure that the Airport Express is able to join the WiFi network. To do that we’ll have to find the MAC address of the Airport Express, which is easy if you have the original box that the thing came with but not so easy if you dug the infernal gadget out of a large, dusty cardboard box of junk and knotted cables that resides in your haunted garage. Happily, there’s an undocumented way of finding the MAC address of an Airport router; simply hold down the Option key on the keyboard while clicking on the icon for the router in the Airport Utility, and instead of the default view (this):
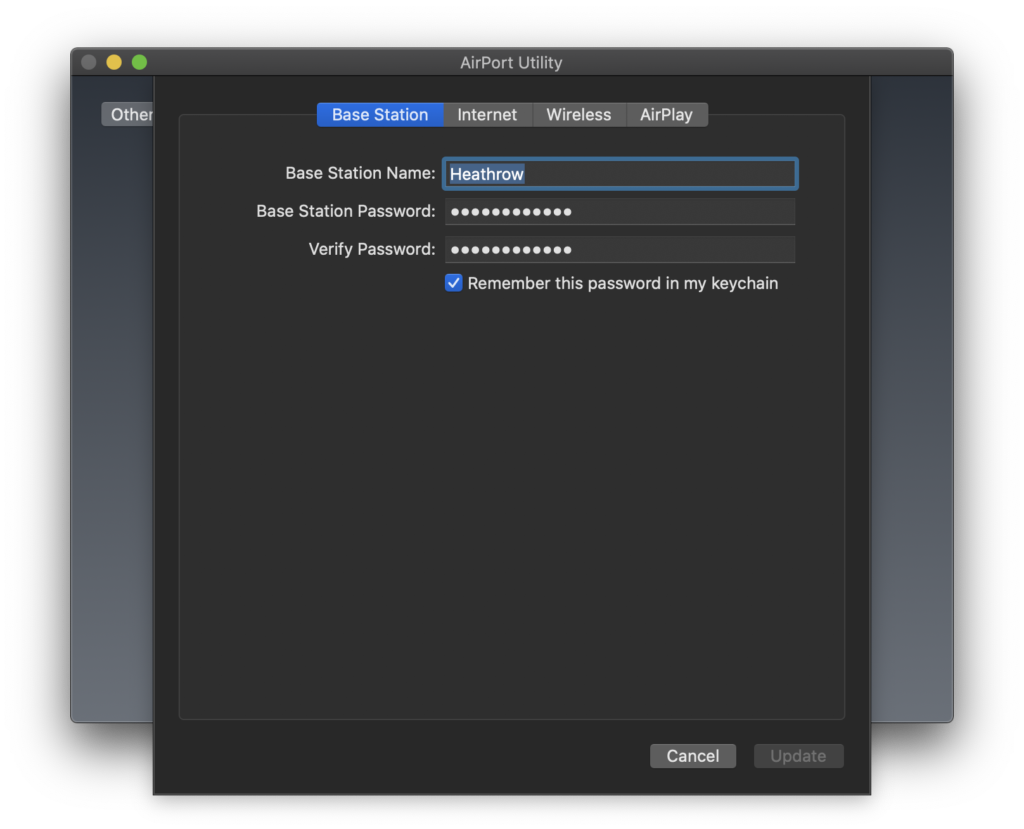
…you get this:
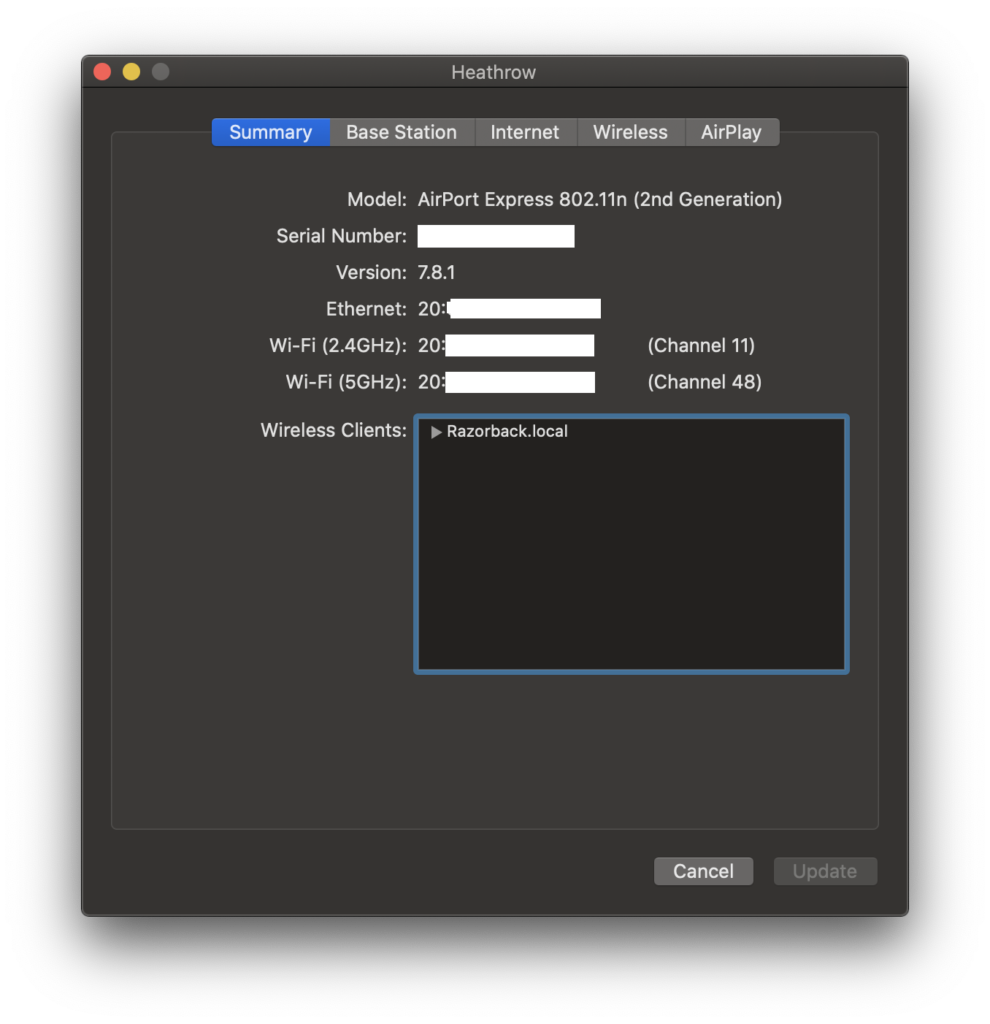
The next step is to take the MAC address of the Wi-Fi interface on the Airport Express and then clone that onto your computer. I chose the 5GHz MAC address, but you may have to do either the 2.4GHz or the 5GHz or both depending on the WiFi portal you’re connecting to. The first thing to do is to connect to the WiFi portal normally, then open up the Terminal and either use the handy alias from earlier on or go ahead and type in sudo ifconfig en0 ether followed by the MAC address of the appropriate wireless interface that you got from the Airport Utility. After a moment you’ll be prompted to sign into the WiFi portal again, and once you’ve done so then that MAC address will then be accepted and useable. Reboot your computer to reset the MAC address to it’s original state. No, I don’t like rebooting either. Yes, you should probably do it.
Once you’re back up and running, turn off WiFi and connect an ethernet cable to the network port on the back of the Airport Express. All things being equal you’ll now be able to connect to the internet. If not then go back a step or two and try the MAC address for the other interface on the Airport Express (2.4GHz or 5Ghz).
Next, you’ll need to go snag the MAC address of your Synology NAS. This is a lot easier; simply open the Control Panel on your DiskStation, click on Info Center, and then the Network tab, thus:

Again, do the same trick: connect your computer to the WiFi portal, fire up Terminal and enter sudo ifconfig en0 ether followed by the MAC address of the DiskStation. Reboot your computer, then shut down the DiskStation, connect it to the network port of your Airport Express, then fire it up again.
This has, I must say, worked flawlessly, but there are caveats. For one thing, there’s no guarantee that you’ll retain the same IP address if there’s, say, a power outage, so if you’re planning on connecting to the Synology remotely then you’d better enable the QuickConnect feature and/or sign the thing into some kind of DDNS (I like dyndns.org, but the Synology supports a lot of options in that space). Finally, I’d encourage the use of Synology Drive to keep data synced between your Synology and your computer, as having the thing safely store and serve important things to your computer is rather the whole point of the exercise, and this makes that considerably easier…